Building Blog Application APIs using SpringBoot - Part 2
In this part of blog, we will learn to create APIs for User. We will create Controllers, Services, Repositories and Models for user specific actions.


Welcome back! Hope you have seen the Previous article - Part 1 where we learned to download and install the required softwares and set up our project.
In this article, we will learn to create User APIs which will allow us to create, delete, update and fetch User details. We will also be creating Controllers, Services, Models, and Repositories for User entity by which we will be exposing our REST endpoints and will be testing them using Postman.
Alright, let's get started!
Creating Packages in our project
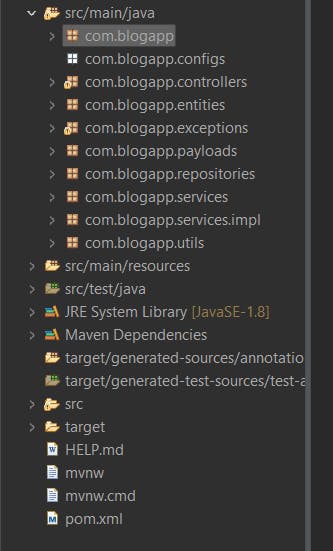
It is a good way to divide classes/interfaces into their relevant packages so that our project is easy to read and understand. So we will create separate packages for Models (or Entities), Controllers, Services, Payloads, Exceptions, Configs, Utils and Service Implementations.
To create a new package, right-click on our main package -> New -> package
It will prompt you to enter a name for your package.
Example: If you are creating an entities package, the entire name of the entities package should be: com.practice.entities
Refer below screenshot and create all the packages by following the above process.(PS: Package names in my screenshot may be different, it depends on what you have given as the group name while creating your project)
Creating User Entity
As we need to store users' data in our database in MySQL, we will create an entity with the name "User" which will have the fields that will be columns in our table.
For now, we will create id, name, email, password and about fields in our User Entity.
User entity class will be :
import javax.persistence.Column;
import javax.persistence.Entity;
import javax.persistence.GeneratedValue;
import javax.persistence.GenerationType;
import javax.persistence.Id;
import javax.persistence.Table;

import lombok.Getter;
import lombok.NoArgsConstructor;
import lombok.Setter;

@Entity
@Table(name = "users")
@NoArgsConstructor
@Getter
@Setter
public class User {

    @Id
    @GeneratedValue(strategy = GenerationType.AUTO)
    private int id;

    @Column(name = "user_name")
    private String name;

    private String email;

    private String password;

    private String about;
}
Let's look at the annotations used:
@Entity: This annotation specifies that the class is an entity. It is applied to the entity class.
@Table: It specifies the primary table for the annotated entity. In this case, it will create a table with the name "users". If we do not specify this annotation, the table will be created with the same name as that of the entity.
@NoArgsConstructor: As the name suggests it generates a no-args constructor.
@Getter and @Setter: These annotations will create getter and setter methods for the fields specified in our entity class.
@Id: This annotation specifies the primary key of an entity.
@GeneratedValue(strategy = GenerationType.AUTO): It will auto-generate the id by incrementing the next Id by 1.
@Column: This annotation is used if we want to give any specific name to any column for any specific field in our entity class.
Create User DTO
We have now created our User entity, but this contains names or fields that are used in our database and it is not a good practice to expose these fields to the outside world like in our Create User API's request body as well as when sending a response back to the client.
Thus, we will create a DTO (Data Transfer Object). This class will contain all the fields that are required from the client's request and will be sent as a response back to the client.
Please note: Make sure the name of the fields are the same in the Entity class as well as DTO as we will use Model Mapper to map these fields with each other.
UserDTO class will be:
import lombok.Getter;
import lombok.NoArgsConstructor;
import lombok.Setter;

@NoArgsConstructor
@Getter
@Setter
public class UserDTO {

    private int id;
    private String name;
    private String email;
    private String password;
    private String about;
}
Creating a Repository interface
A repository is a mechanism for encapsulating storage, retrieval, and search behaviour that emulates a collection of objects.
We will be extending our UserRepository interface with JPARepository<?,?> interface, where 1st parameter is the Entity class for which we will perform operations and 2nd parameter is the data type of the primary key field in our entity class.
UserRepo interface will be:
import org.springframework.data.jpa.repository.JpaRepository;

import com.blogapp.entities.User;

public interface UserRepo extends JpaRepository<User, Integer> {

}
Currently, this interface will not have any methods because the methods that we require are already provided by JpaRepository. We will create some out-of-the-box methods if and when required for our User entity.
Additional Info: One doubt you might have is why have we created an interface for UserRepo. You can find the answer here.
Creating Services
Now we will create our Service interface and its Implementation class which will have all the business logic and will interact with our UserRepo interface to perform operations that we need to perform with the user.
Below I have given an example of "Create User". You can try to create similar methods and their implementation for "Get all users", "update user", "delete user" and "Get specific user by id". If you are stuck you can refer code here.
We will first create an interface:
import com.blogapp.payloads.UserDTO;

public interface UserService {
    UserDTO createUser(UserDTO user);
}
The methods inside this interface will have implementation is below Service Implementation class:
import org.modelmapper.ModelMapper;
import org.springframework.beans.factory.annotation.Autowired;
import org.springframework.stereotype.Service;
import com.blogapp.entities.User;
import com.blogapp.payloads.UserDTO;
import com.blogapp.repositories.UserRepo;
import com.blogapp.services.UserService;

@Service
public class UserServiceImpl implements UserService {

    @Autowired
    private UserRepo userRepo;

    @Autowired
    private ModelMapper modelMapper;

    @Override
    public UserDTO createUser(UserDTO user) {
        User uEntity = dtoToUserEntity(user);
        User saveduser = userRepo.save(uEntity);
        return userEntityToDTO(saveduser);
    }

    private User dtoToUserEntity(UserDTO user) {
        User userEntity = this.modelMapper.map(user, User.class);
        return userEntity;
    }

    private UserDTO userEntityToDTO(User userEntity) {
        UserDTO userDTO = this.modelMapper.map(userEntity, UserDTO.class);
        return userDTO;
    }

}
@Service: This annotation is used to mark the class as a service provider. So overall this annotation is used with classes that provide some business functionalities.
Model Mapper is a Java library that makes mapping two objects easy. In this case, we need to convert our UserDTO to a User entity and instead of creating objects of each other while converting from UserDTO to User entity while creating user and vice versa while fetching all the users, it is easier just by using Model Mapper.
You can read more about it here -> Model Mapper.
In the createUser method, we have used the save() method provided by JPARepository and by passing an object of User entity type, it will save the details of the user in our database.
Creating Controllers
Now we will create a controller, which will have the endpoints that we would user in our APIs.
import org.springframework.beans.factory.annotation.Autowired;
import org.springframework.http.HttpStatus;
import org.springframework.http.ResponseEntity;
import org.springframework.web.bind.annotation.PostMapping;
import org.springframework.web.bind.annotation.RequestBody;
import org.springframework.web.bind.annotation.RequestMapping;
import org.springframework.web.bind.annotation.RestController;
import com.blogapp.payloads.UserDTO;
import com.blogapp.services.UserService;

@RestController
@RequestMapping("/api/users")
public class UserController {

    @Autowired
    private UserService userService;

    //Add user

    @PostMapping("/createUser")
    public ResponseEntity<UserDTO> createUser(@RequestBody UserDTO userDTO){
        UserDTO createdUserDTO =  userService.createUser(userDTO);
        return new ResponseEntity<>(createdUserDTO,HttpStatus.CREATED);
    }
}
@RestController: This annotation is applied to a class to mark it as a request handler. Spring RestController takes care of mapping request data to the defined request handler method. Once the response body is generated from the handler method, it converts it to JSON or XML response.
@RequestMapping: This is Spring MVC's most common and widely used annotation. It is used to map web requests onto specific handler classes and methods and make web resources addressable.
ResponseEntity is meant to represent the entire HTTP response. We can control anything that goes into it such as HTTP status code, headers, and body. Here we have passed the UserDTO object to our ResponseEntity class as we have to show the response as an UserDTO object once the user is created successfully.
Now one of the most important files in our project which will contain all the configurations is the application.properties file which is present at the src/main/resources location.
We will add the following properties inside this file.
server.port=9090
#db configurations
spring.datasource.url=jdbc:mysql://localhost:3308/blog_app_apis
spring.datasource.username=
spring.datasource.password=
#MySql driver name
spring.datasource.driver-class-name=com.mysql.cj.jdbc.Driver
#MySql version dialect
spring.jpa.properties.hibernate.dialect=org.hibernate.dialect.MySQL8Dialect
spring.jpa.hibernate.ddl-auto=update
#shows query while starting tomcat on console
spring.jpa.show-sql=true
You can set any port you want in server.port property.
spring.datasource.url This property contains the URL that we will use to connect with our database. Make sure the hostname and port number is what you have given when configuring MySQL for the first time.
spring.datasource.username= and spring.datasource.password= Enter the username and password you have set while setting up the MySQL database for the first time.
Now try to start the application by find Java class in one of which will contain code similar to this:
import org.springframework.boot.SpringApplication;
import org.springframework.boot.autoconfigure.SpringBootApplication;

@SpringBootApplication
public class BlogAppApisApplication {

    public static void main(String[] args) {
        SpringApplication.run(BlogAppApisApplication.class, args);
    }

}
Right-click anywhere in this class -> Go to "Run As" -> Click "Java Application".
This should start running the application.
If everything goes fine, you will be able to see the following line in the console below.
2023-05-20 00:45:25.464 INFO 11188 --- [ restartedMain] o.s.b.d.a.OptionalLiveReloadServer : LiveReload server is running on port 35729
2023-05-20 00:45:25.528 INFO 11188 --- [ restartedMain] o.s.b.w.embedded.tomcat.TomcatWebServer : Tomcat started on port(s): 9090 (http) with context path ''
2023-05-20 00:45:25.545 INFO 11188 --- [ restartedMain] com.blogapp.BlogAppApisApplication : Started BlogAppApisApplication in 7.047 seconds (JVM running for 7.82)
This means your application is up and running!! Congratulations...You just created a basic application using spring boot.
In the next article, we will use Postman to Test the APIs that we have created. Make sure to try out other operations of the User.
Please let me know in the comments if you loved the article and if you were able to create other methods on your own or even if you tried something of your own.
Thank you for reading this article. See you in the next one!